Sunday, July 5, 2015

Revisiting The (green) $6 Table


I've been wanting to post some updated photos of the green table for a while now and only just today got around to snapping some shots! The old photos have been quite popular on pinterest, but I must admit how it has always bothered me that those pictures were taken in the driveway in my parent's house because I had nowhere else to put the dang thing! This green table has been to two different apartments in Houston with us and is now with us back in Tennessee. Please pardon the tattered hand-me-down chairs that used to be bar-height (that my husband and I hacked down to this size with a handsaw). The missing two chairs are currently being used to barricade the dog from going upstairs. We live an illustrious life here :)


If you need a refresher on The $6 Table, here is the first post I did about it. The Annie Sloan chalk paint (in Antibes) has held up great over the years and has made moving a lot less stressful since scuffs and small abrasions really only add to the look.

Original state, pretty rough

The original stain was unfinished and so dark that it obscured the grain. Once I redid it, it looked gorgeous


Here's a gratuitous shot of my lovely flowers and that gorgeous grain that looks even better with more light.

Hope you've enjoyed the new pictures and that perhaps they make a little more sense in an actual house instead of a driveway! I know I also feel curious about how my DIYs are going to hold up over time, so I'm happy to report that this chalk painted piece finished with wax has held up magnificently. 


Wednesday, April 29, 2015

The Mirrored Jewelry Window

My goodness it has been a long time since I've had a project!! We are presently living in East Tennessee and are fortunate enough to be renting a place with a GARAGE, which means I now have a new "studio"! I'm quite excited, if you can't tell from all the exclamation points. There are a few projects in the works already, one that I'm particularly excited about. It might end horribly though, so I'll hold off on introducing it.

Today I want to share a project that I started a few years ago (and mentioned ever so briefly here), left in my last "studio" (aka my parent's garage), and only just now finished a few years later.

It has probably been 4 years since my mom and I picked up a number of old windows at a garage sale and stowed them away in the garage. Although there are a plethora of ideas on Pinterest these days (a picture frame, for example), we were at a loss for what to do with them at the time. My first inclination was to make a mirror out of one, using Krylon's Looking Glass spray paint. When sprayed on glass it creates a mirror effect. In fact, I intended to make it look like an old, antique mirror.


My first step was to remove all the chippy paint that was falling off all over the garage. I scraped and sanded and when I couldn't take it anymore, I mixed up some Antibes chalk paint with one of the blue chalk paints I had on hand (forgive me, it has been years and I don't recall which color I used!) and slapped it on. I then of course distressed it so that the white under layer peeks through in some spots. I like the way the rusted handles add to the character, too.


You may notice that there are 3 panes missing on this window, making it asymmetrical. I debated knocking out a pane to even it out, but decided against it. I left it in and sprayed the panes from the back with Krylon Looking Glass spray. At the time I started this project, I was in the throes of a mercury glass obsession. In fact, I still love mercury glass! I wanted to make the mirrored panes look mercury glassish/antique mirroresque, if you will. I did some research and decided on a course of action---a handful of layers interspersed with a misting of a vinegar/water solution. I'll be honest, it did not turn out how I intended. I think that this method could work with some practice, but that Krylon stuff is EXPENSIVE and I'm not that picky! The window frame itself has a "vintage" charm about it and the imperfect mirror seems fitting (although I suppose it could be more perfectly imperfect, if you catch my drift). This is the point where I stopped all those years ago because it just wasn't doing it for me. It didn't seem finished. When my now-husband and I moved to Houston, this flawed window mirror just didn't make the cut and was left behind.

Fast forward to it hanging out in my new garage back in Tennessee. But what to do with it! My brother came to visit us one weekend and we went picking through a recently torn-down house from the 1920s (with permission, of course). We packed the back of my brother's hatchback full of goodies and hauled it back to my garage. I now have a stack of aged, rustic, full-of-character wood downstairs at my disposal! I was looking at a nice, flat piece when it occurred to me that I could screw that sucker to the bottom of my homeless mirror and make a shelf. I had already been toying with the idea of making it a jewelry holder, and this shelf was the perfect solution to how I was going to house earrings and other odds and ends.

I screwed in hooks across the frame, for holding necklaces, and screwed that exceptionally thin piece of wood to the bottom. It took a lot of cleaning to get all the years of funk off the wood, but with some elbow grease and a few coats of spray poly it looked bright and rustic at the same time. All that was left was to affix some hardware to the back and slap it on the wall! Here are the finished photos (I still need to write about the dresser below it! It has a similar story of being abandoned in my parents' garage until recently).


I hope this inspires you to branch out from all the window-picture-frame ideas out there and try a new window project! Let me know if you do--I would love to see what you make of it! What are some other cool window project ideas?


Sunday, November 17, 2013

The Dresser My Fiance Hates--our Giant Blue Buffet


Today's project is one that spanned across 10 months and 2 states. My godmother had picked up this very solid buffet from a garage sale one weekend, and it sat in my garage while I worked on other projects. I was putting it off because it is quite a large piece of furniture and constituted quite an undertaking in my eyes! When I finally got around to it, I decided to paint it blue (Provence I believe?) with the intent of doing a sort of white wash over just the top of the buffet.

Here is the buffet in original condition. Very classic buffet style, but incredibly solid and well-made. Unfortunately, it had a varnish so thick that it was practically a mirror.


Partially sanded top, untouched and reflective bottom


For the top, I intended to strip it, sand it, then paint a white wash over the top that allowed some of the character of the wood to show through. I was somewhat discouraged by the thick varnish, so I got a bit over-zealous the power sander. After getting the worst of the reflective finish off the top, I started to notice how beautiful the wood was underneath that outdated shine. I decided I wanted to finish sanding the worst of the finish off and then leave the wood as is. Unfortunately, I got a little crazed with the power sander before noticing this and thus a bit sloppy. The sanding is uneven in some spots and is something I will probably go back and fix in the future, but for now I have a nice solid wooden top!


My next step was to slap on a few layers of paint. I believe the color is Provence. Visually, it was a huge, blue buffet and looked a bit flat to me when I had finished painting. I wanted to bring some visual interest to the piece, so I painted the decorative groove in the two hinged doors white. Holy crap that looked ugly! I immediately painted back over it with the blue and distressed to let it show through it a bit. Much better! Though it cost me a good while and a lot of elbow grease, I clear waxed the entire thing. At this point, we were approaching the Christmas season and the fiance and I moved to Texas. Much to his displeasure (I mean, this thing is soooo heavy and soooo blue), I insisted we bring it, unfinished as it was.

Looking very flat and boring, albeit blue

Oh yuck, not right at all

Just hanging with my girl! 

This big 'ole buffet sits in our bedroom now and the fiance uses it as a dresser. I think he has slowly come to like it, surprisingly. A few months ago I finally got around to finishing the distressing on it, though you couldn't tell from the photos unless they are close-ups. I decided to go rather light on it, nothing crazy, just the edges mostly.

This is becoming a thread in my posts, but again please excuse the lighting. Our apt is so small and dark I have no idea how to get better pictures! Just gotta throw open those windows and hope for the best :) That is the reason the buffet looks a few different shades of blue in different pictures. If you're curious exactly what Provence looks like, this link to Annie Sloan's website shows it pretty accurately in my opinion (the furniture piece to the right, not the paint swatch).

Here is the finished blue buffet!


I've nearly run out of projects to post about now! I have lots of things planned in my head, but our teeny tiny apartment and lack of power tools inhibits their creation a bit. Hopefully around January we will be moving to a larger place, maybe then we will have the space for more ambitious creations!

Wednesday, October 9, 2013

Branching Out: Using Milk Paint on our Bedroom Headboard


As evidenced by the extensive collection of chalk painted pieces crowding our apartment, I am a big fan of the Annie Sloan chalk paint. It is easy stuff to use and it has always turned out well for me! However, I was finding it hard to find a convenient supplier of chalk paint in Houston and having my mom ship me some from Tennessee was out of the question (that stuff is already crazy expensive before shipping costs!). I played around online and decided to try out Miss Mustard Seed's milk paint, since I could buy it online and have it shipped to me at a rather reasonable price, which is to say expensive but not so much as Annie Sloan. I'm thinking the chalk paint goes further, and I probably could have ordered it online and paid only a little more than for the milk paint, but I was curious to try out this "milk paint" and see what all the fuss was about.

The headboard I chose to paint is a gorgeous and very solid, wood "antique" of sorts that belonged to my fiance's stepfather's father. I spotted it hanging out alone in a spare bedroom at his mother and stepfather's house, did a double take and thought "hello gorgeous." I would have loved to maintain the beautiful wood, I even would have sucked it up and stripped the whole thing just to re-stain this beauty, but the very top decorative molding is made from plastic. I didn't know how to get around this, so it became the perfect candidate for my next painting project!

Now for the milk paint: Miss Mustard Seed's milk paint came in dry form in a little pouch and requires that you mix it before use. I also ordered the MMS additive that will keep it from flaking off too much (I wanted a slightly cleaner look than what I was seeing on her website). I watched Miss Mustard Seed's online tutorials and how-to videos and felt well prepared, but damn that stuff did not want to mix!! I mixed and mixed and mixed and it was still watery with goop on the bottom. There was nothing else to do but either scrap it or lay it on, so I sucked it up and laid it on... ohmygosh it looked bad. Really bad. It was almost bubbly looking with little crystals in it and was very rough to the touch. I tried a different brush, I used less paint thinking maybe I was using too much, I tried using different strokes, I even sanded it once dry--all to no avail. In my usual style, I got frustrated that I couldn't figure out how to fix it and left it for about a week (okay, maybe two) until the fiance said finish the damn headboard or don't, but I'm moving the bed back! Whatever, Miss Mustard Seed practically says it will look like crap at first and then get better with more coats, so I mixed up the next coat (also goopy and displeasing) and slapped that on. Then I did another. And another. After three coats, I was out of paint and decently pleased with the outcome, so I scruffed it up a bit with some sandpaper once it had dried and declared it done. I would have waxed it if I had had any handy, but it has held up well the past 2 months or so and any distressing only adds character and authenticity to it, so I believe I am going to leave it. And now some pictures!


So there is the first coat above. Not so hot, right? And I forgot to mention that I did sneak a little chalk paint into this project ;) I painted the shell/flower motif so that it might subtly coordinate with our bright blue buffet that we use as a dresser in our bedroom (which I need to blog about!). Below you will see the whole headboard after one coat. Not too hideous for a first coat, no, but keep in mind that this whole headboard has the above-pictured texture (yikes).


Also, it would be negligent of me not to mention the dog hair stuck in every single layer. Broo had some needy moments while I was working on this project and as careful as I tried to be, a black dog and sticky white paint will be together no matter what. You can't stop it. So I embraced it and snapped a photo of my needy, shedding furchild "helping" me paint. Thankfully you really can't see the hairs unless you search for them!


Now for some pictures of the completed headboard!


You'll have to excuse the dreadfully wrinkled pillow cases. We're not fancy around here--if it's clean we roll with it. Someday it will be nice to be fancy; we'll paint the walls, maybe get a rug, find 4 matching pillowcases, buy curtains that fit our space instead of using leftovers from college (that now have flecks of white paint on them, oops). Until that time though, I can be happy with the hodgepodge set up we have ;)

After this experience using milk paint, I must confess I still remain a chalk paint girl. I'm not horribly disappointed or even displeased with the outcome, but it was a large pain in the arse and didn't save me any money either. I could see milk paint being advantageous if you are going for the chippy look that it lends itself to, but I myself am probably done with milk paint for a while!


Monday, August 12, 2013

Going backwards--my second Chalk Paint piece (plus some exciting news!)


Wow, so many months since my last real post! Our little apartment cramps my style more than a bit when it comes to hoarding furniture and working on projects bit by bit. There may or may not be flecks of paint on the walls, carpet and maaaaaybe curtains from my most recent project (but they are tiny flecks, promise!)  We even had to dismantle my green table and push it under the bed as soon as we moved in because there is no room for it! Shameful, I know.

Today I'm actually going to post pictures of my second ever chalk paint project---an Ethan Allen chair that I picked up at a garage sale for I believe $35. I kinda felt like the guy was ripping me off, since the chair was ugly, beat up and the cushions were disgusting. The foam was rotting away and the design was very outdated, but what drew me to the chair was how very solid it was. My mom kept telling me how good a brand Ethan Allen is, so I got the owner down to $35 and lugged it home. I had a little repair to do to the net-like wire-things that hold the seat cushion in place (excuse my sophisticated jargon there) which I expertly rigged with some thingamajigs from Home Depot, but once that was done I got to painting!


 This is the original state---beautiful wood but very very dark and dated looking. The color of the wood wasn't displeasing per se, but with the styling of the chair I didn't know how to update the look while leaving the wood. Enter the chalk paint!


I slapped on a couple layers of Duck Egg blue, distressed to my heart's content, and then wiped on a layer of clear wax. Now for the cushions---those were a potential problem, as I do not sew. Worse, the foam from the previous cushions had degraded to a point that it was gross and messy and not salvageable. I had picked up a bolt of fabric from another garage sale that I thought looked good with the Duck Egg blue, and when my godmother (and partner in crime) spotted the cloth draped over the old cushions, she offered to have them remade for me as my Christmas gift! It was a most generous offer for which I am so grateful, because without her I would have left that cloth tucked over the old cushions indefinitely :P  They turned out so well, and my godmother not only had the foam replaced but she also had her seamstress add piping to the edges, which looks quite fancy!

 Pictures really just don't do justice to these chalk paint colors, and since my apartment doesn't receive good light at any point of the day (and I can't drag these pieces 4 flights down and outside either) the photos are especially disappointing. Know that I am embarrassed for the quality of them but find no better alternatives. Hopefully you can still get a feel for the piece.


I'm also pretty thrilled with our new jute rug
The doberman pillow in this picture is one my mother made using a photo of our Broo! 


Judging by the amount of dog hair I find on this chair, this is what the stinker does when we're not home and have otherwise physically barred him from the couch. He does look preeeeetty cute in it though! :)


I have two more completed projects to share sometime soon, so look for those! I even branched out from chalk paint *gasp* so I'll show you how that went too.

One last thing---since my last post, the bf and I got ENGAGED! So now I have to call him fiancé and wear this absolutely perfect ring  :D


<3


For a year I wore on my ring finger a simple silver knot the bf fiancé had gotten me as a sign of his commitment. He always told me he wanted to wait to get engaged until he could buy me the ring I deserved--boy did he deliver on that!!


Thursday, March 21, 2013

And then there were THREE: Broö


     March 2013 finds the bf and I living in a nice (little) apartment in Houston, Texas, far away from our beloved green hills and mountains in Tennessee. We have been here since the beginning of January and it has been nice so far, though it has been getting increasingly warm, bordering on hot, which has me worried! I'm not one for the oppressive heat and humidity that smothers the city like a hot woolen blanket in the summer months. The bf and I have actually spent the past 2 summers here (or rather I visited him for a month or so each summer) and it was brutal---my plan then was to never go outside unless I was at the pool, since I am prone to fainting and general crankiness in the heat, but that just won't work for us this summer since WE GOT A DOG! :D


It has been a long time coming, but we finally got a dog. We still want a frenchie like crazy, but considering the heat here (bad news for brachycephalic dogs), the cost of potential breed specific surgeries (palette reduction for proper breathing), and the simple fact that there are just way too many good dogs being put down in shelters in part from over-breeding, we chose to adopt.


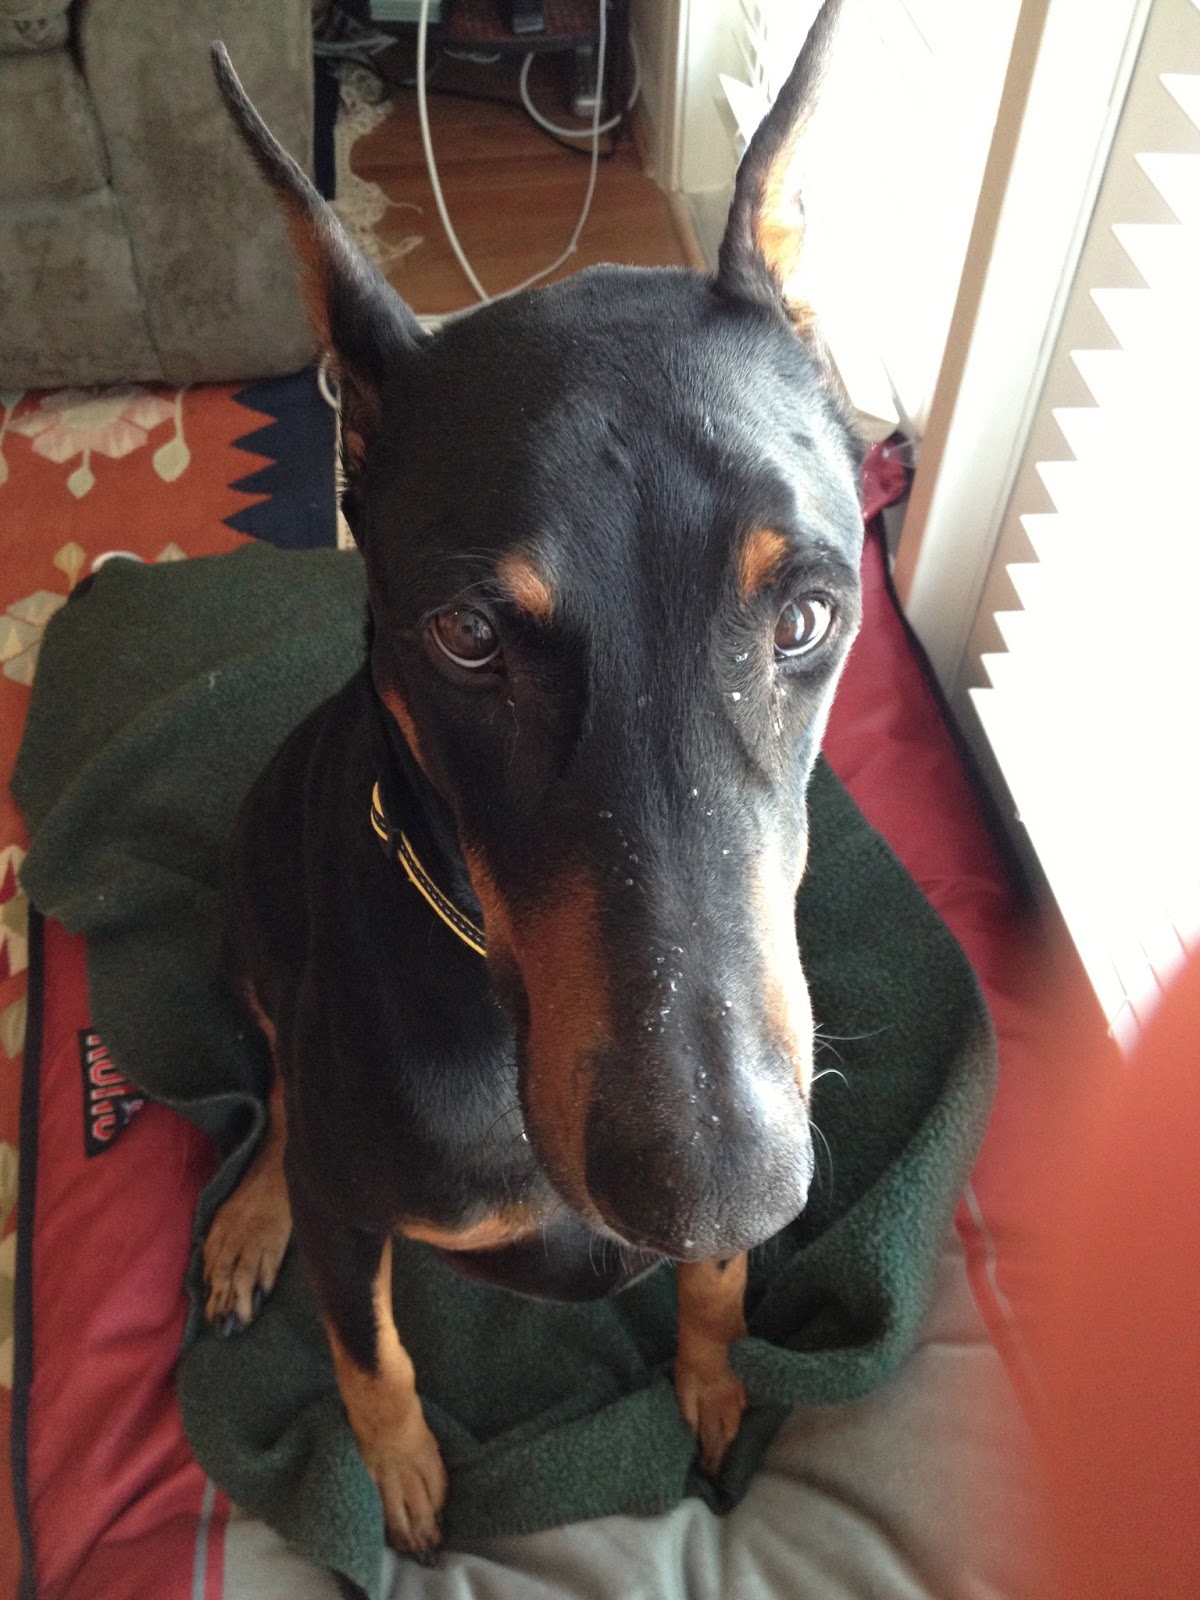
Since we knew we wanted a doberman, we went through the Houston Area Doberman Rescue (HADR) and highly recommend them. The gentle giant we ended up with is a sweet 8 year old, weighing in at 90 pounds, who lived with the same family his whole life. He is blessedly well mannered and has obviously been well cared for his entire life. He came to the rescue from a 78-year old lady who needed to have back surgery and worried she wouldn't be able to care for him properly during her long recovery. I'm sure it was incredibly painful for her to part with him, especially since he was her departed husband's baby, and the rescue passed on to us an entire garbage bag she had brought with him, full of dog-sized fleece blankets, nail clippers, toothbrushes, shampoo and even beef-flavored toothpaste. We couldn't fathom what all the blankets were for, since he already had a dog bed, but it turns out that he gets cold at night when we turn the air conditioning on, as he must have when he was with his first owner, and he curls up into a tight little ball! I love dragging the dog bed into the bedroom at night as he sleepily follows me and plops down, curling into that little ball, and gives me a heavy-lidded look as I tuck one of his old blankets around him.


Broö likes peanut butter. A lot.

He is really a joy to have and we are so happy to be his new family! We're still learning all his little quirks and getting used to having this furbaby invade every aspect of our relationship :P

OH! And his name is Broö, pronounced "brew" like a beer. It really has no meaning in particular, we just thought it fit him.


Not enjoying mom and dad getting up at 5 am for work

Broö always floods the apt when he drinks water--it gets everywhere. Even on his own face.

Us at the dog park. We live in a small apt, so we go a couple times a day to run around and socialize!

I wish I could throw further, he gets visibly frustrated with my poor throwing! (This photo is for show only and is not an indication of how I throw/hold the ball ;)


Annoying but necessary PSA:

If you're looking to add a furry new member to your own family, I strongly urge you to adopt. I don't want to rant about the crises that are going on with over-breeding and the overflow of unwanted animals at shelters, but if you are unfamiliar with these issues they merit some research on your part. There are presently a whole host of serious health problems cropping up in "purebred" dogs as they are manically bred (inbred, more often than not) more and more for exaggerated characteristics (excessive wrinkles, short legs, curly tail, smushed face, etc), without regard for the viability of those characteristics or the general health of the dog. This is a well-documented problem that is being disregarded by many breeders, so do your research!! If you have your heart set on a certain breed, consider going through a breed-specific rescue (which is what we did).

I know these articles and videos are lengthy, but I had no idea this problem even existed until I happened across the first BBC piece the other day. The rest of the research I've done online corroborates with what they reported.

  • BBC produced a follow-up video, called Pedigree Dogs Exposed 3 Years Later, which you can also find online
  • Although from 2007, this paper will give you a good idea of the problems surrounding the Kennel Clubs and breed standards if you prefer text over video

I don't wish to sound as if I'm preaching from a high-horse (I'm just going to combine those two idioms), but these are some issues that sound quite frivolous (breed standards? who cares?) and yet are truly important when it comes to alleviating the suffering (both human and animal) that is occurring without our knowledge. I'm going to stop adding paragraphs to this now, but do your research and know what you're getting into. Don't think that just because someone is offering AKC registered dogs that they are a good breeder or that they have healthy dogs. Do your research! Or better yet, (much better) adopt!!! :)
  

Friday, December 21, 2012

Where have all the posts been??


I cannot believe how long it has been since I've posted! The spool seems like it was only a month ago (obviously, that isn't so). I'm currently in the process of surviving the holidays at work/home and also packing up my life to move to Houston, Texas with my wonderful guy. You can imagine how difficult that is when most of your belongings are large pieces of furniture. I think the bf is about to lose his mind trying to find space in our little apt for all these "treasures" lol but don't worry, I will pay for it thoroughly because it'll just be us 2 loading/unloading the Uhaul :) I actually do have a new piece I've been working on, a large piece, but it isn't finished yet and may not even be finished until after we move (don't tell the bf, shh). Hopefully my next update will be a look at our new apartment!

Happy Holidays!! And remember, it's the most wonderful time of the year :P