Wednesday, October 9, 2013

Branching Out: Using Milk Paint on our Bedroom Headboard


As evidenced by the extensive collection of chalk painted pieces crowding our apartment, I am a big fan of the Annie Sloan chalk paint. It is easy stuff to use and it has always turned out well for me! However, I was finding it hard to find a convenient supplier of chalk paint in Houston and having my mom ship me some from Tennessee was out of the question (that stuff is already crazy expensive before shipping costs!). I played around online and decided to try out Miss Mustard Seed's milk paint, since I could buy it online and have it shipped to me at a rather reasonable price, which is to say expensive but not so much as Annie Sloan. I'm thinking the chalk paint goes further, and I probably could have ordered it online and paid only a little more than for the milk paint, but I was curious to try out this "milk paint" and see what all the fuss was about.

The headboard I chose to paint is a gorgeous and very solid, wood "antique" of sorts that belonged to my fiance's stepfather's father. I spotted it hanging out alone in a spare bedroom at his mother and stepfather's house, did a double take and thought "hello gorgeous." I would have loved to maintain the beautiful wood, I even would have sucked it up and stripped the whole thing just to re-stain this beauty, but the very top decorative molding is made from plastic. I didn't know how to get around this, so it became the perfect candidate for my next painting project!

Now for the milk paint: Miss Mustard Seed's milk paint came in dry form in a little pouch and requires that you mix it before use. I also ordered the MMS additive that will keep it from flaking off too much (I wanted a slightly cleaner look than what I was seeing on her website). I watched Miss Mustard Seed's online tutorials and how-to videos and felt well prepared, but damn that stuff did not want to mix!! I mixed and mixed and mixed and it was still watery with goop on the bottom. There was nothing else to do but either scrap it or lay it on, so I sucked it up and laid it on... ohmygosh it looked bad. Really bad. It was almost bubbly looking with little crystals in it and was very rough to the touch. I tried a different brush, I used less paint thinking maybe I was using too much, I tried using different strokes, I even sanded it once dry--all to no avail. In my usual style, I got frustrated that I couldn't figure out how to fix it and left it for about a week (okay, maybe two) until the fiance said finish the damn headboard or don't, but I'm moving the bed back! Whatever, Miss Mustard Seed practically says it will look like crap at first and then get better with more coats, so I mixed up the next coat (also goopy and displeasing) and slapped that on. Then I did another. And another. After three coats, I was out of paint and decently pleased with the outcome, so I scruffed it up a bit with some sandpaper once it had dried and declared it done. I would have waxed it if I had had any handy, but it has held up well the past 2 months or so and any distressing only adds character and authenticity to it, so I believe I am going to leave it. And now some pictures!


So there is the first coat above. Not so hot, right? And I forgot to mention that I did sneak a little chalk paint into this project ;) I painted the shell/flower motif so that it might subtly coordinate with our bright blue buffet that we use as a dresser in our bedroom (which I need to blog about!). Below you will see the whole headboard after one coat. Not too hideous for a first coat, no, but keep in mind that this whole headboard has the above-pictured texture (yikes).


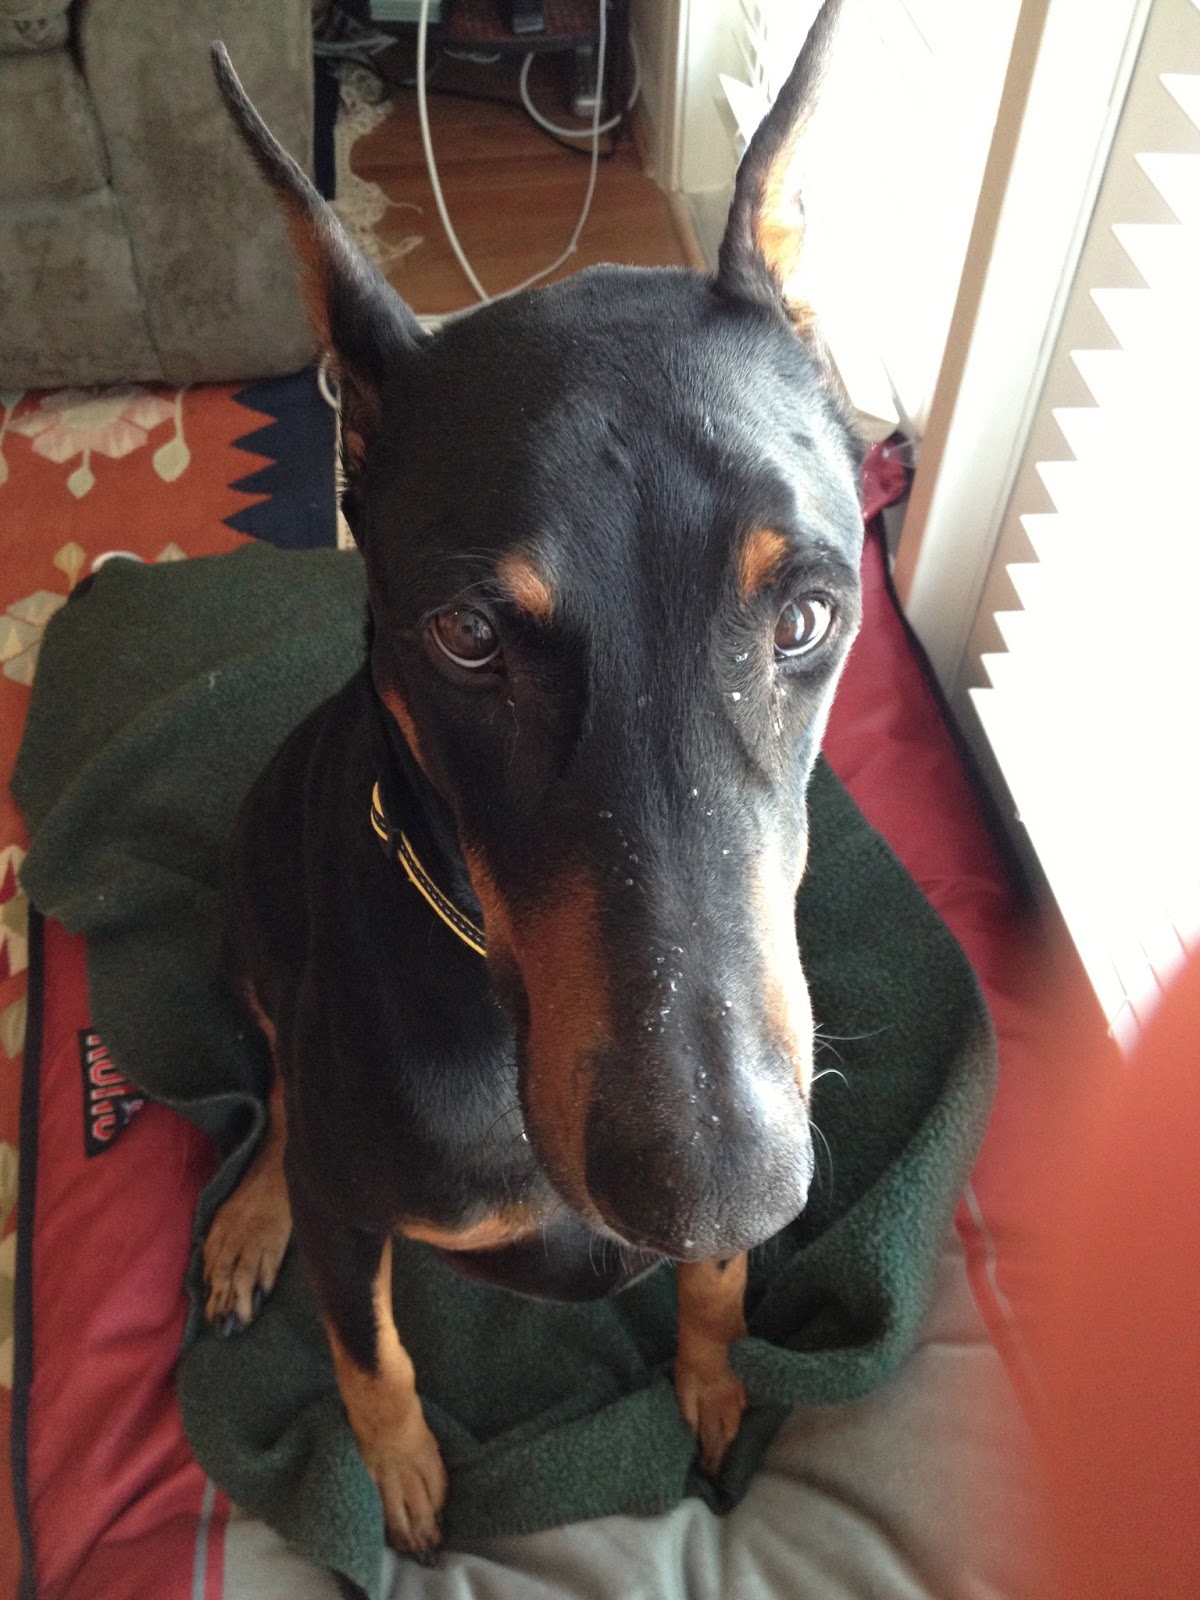
Also, it would be negligent of me not to mention the dog hair stuck in every single layer. Broo had some needy moments while I was working on this project and as careful as I tried to be, a black dog and sticky white paint will be together no matter what. You can't stop it. So I embraced it and snapped a photo of my needy, shedding furchild "helping" me paint. Thankfully you really can't see the hairs unless you search for them!


Now for some pictures of the completed headboard!


You'll have to excuse the dreadfully wrinkled pillow cases. We're not fancy around here--if it's clean we roll with it. Someday it will be nice to be fancy; we'll paint the walls, maybe get a rug, find 4 matching pillowcases, buy curtains that fit our space instead of using leftovers from college (that now have flecks of white paint on them, oops). Until that time though, I can be happy with the hodgepodge set up we have ;)

After this experience using milk paint, I must confess I still remain a chalk paint girl. I'm not horribly disappointed or even displeased with the outcome, but it was a large pain in the arse and didn't save me any money either. I could see milk paint being advantageous if you are going for the chippy look that it lends itself to, but I myself am probably done with milk paint for a while!


Monday, August 12, 2013

Going backwards--my second Chalk Paint piece (plus some exciting news!)


Wow, so many months since my last real post! Our little apartment cramps my style more than a bit when it comes to hoarding furniture and working on projects bit by bit. There may or may not be flecks of paint on the walls, carpet and maaaaaybe curtains from my most recent project (but they are tiny flecks, promise!)  We even had to dismantle my green table and push it under the bed as soon as we moved in because there is no room for it! Shameful, I know.

Today I'm actually going to post pictures of my second ever chalk paint project---an Ethan Allen chair that I picked up at a garage sale for I believe $35. I kinda felt like the guy was ripping me off, since the chair was ugly, beat up and the cushions were disgusting. The foam was rotting away and the design was very outdated, but what drew me to the chair was how very solid it was. My mom kept telling me how good a brand Ethan Allen is, so I got the owner down to $35 and lugged it home. I had a little repair to do to the net-like wire-things that hold the seat cushion in place (excuse my sophisticated jargon there) which I expertly rigged with some thingamajigs from Home Depot, but once that was done I got to painting!


 This is the original state---beautiful wood but very very dark and dated looking. The color of the wood wasn't displeasing per se, but with the styling of the chair I didn't know how to update the look while leaving the wood. Enter the chalk paint!


I slapped on a couple layers of Duck Egg blue, distressed to my heart's content, and then wiped on a layer of clear wax. Now for the cushions---those were a potential problem, as I do not sew. Worse, the foam from the previous cushions had degraded to a point that it was gross and messy and not salvageable. I had picked up a bolt of fabric from another garage sale that I thought looked good with the Duck Egg blue, and when my godmother (and partner in crime) spotted the cloth draped over the old cushions, she offered to have them remade for me as my Christmas gift! It was a most generous offer for which I am so grateful, because without her I would have left that cloth tucked over the old cushions indefinitely :P  They turned out so well, and my godmother not only had the foam replaced but she also had her seamstress add piping to the edges, which looks quite fancy!

 Pictures really just don't do justice to these chalk paint colors, and since my apartment doesn't receive good light at any point of the day (and I can't drag these pieces 4 flights down and outside either) the photos are especially disappointing. Know that I am embarrassed for the quality of them but find no better alternatives. Hopefully you can still get a feel for the piece.


I'm also pretty thrilled with our new jute rug
The doberman pillow in this picture is one my mother made using a photo of our Broo! 


Judging by the amount of dog hair I find on this chair, this is what the stinker does when we're not home and have otherwise physically barred him from the couch. He does look preeeeetty cute in it though! :)


I have two more completed projects to share sometime soon, so look for those! I even branched out from chalk paint *gasp* so I'll show you how that went too.

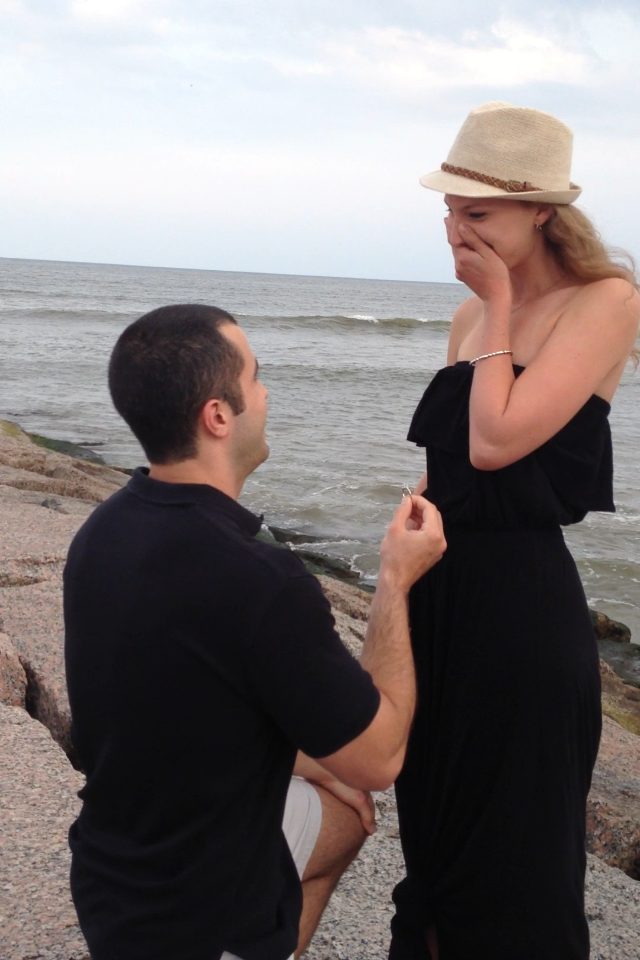
One last thing---since my last post, the bf and I got ENGAGED! So now I have to call him fiancé and wear this absolutely perfect ring  :D


<3


For a year I wore on my ring finger a simple silver knot the bf fiancé had gotten me as a sign of his commitment. He always told me he wanted to wait to get engaged until he could buy me the ring I deserved--boy did he deliver on that!!


Thursday, March 21, 2013

And then there were THREE: Broö


     March 2013 finds the bf and I living in a nice (little) apartment in Houston, Texas, far away from our beloved green hills and mountains in Tennessee. We have been here since the beginning of January and it has been nice so far, though it has been getting increasingly warm, bordering on hot, which has me worried! I'm not one for the oppressive heat and humidity that smothers the city like a hot woolen blanket in the summer months. The bf and I have actually spent the past 2 summers here (or rather I visited him for a month or so each summer) and it was brutal---my plan then was to never go outside unless I was at the pool, since I am prone to fainting and general crankiness in the heat, but that just won't work for us this summer since WE GOT A DOG! :D


It has been a long time coming, but we finally got a dog. We still want a frenchie like crazy, but considering the heat here (bad news for brachycephalic dogs), the cost of potential breed specific surgeries (palette reduction for proper breathing), and the simple fact that there are just way too many good dogs being put down in shelters in part from over-breeding, we chose to adopt.


Since we knew we wanted a doberman, we went through the Houston Area Doberman Rescue (HADR) and highly recommend them. The gentle giant we ended up with is a sweet 8 year old, weighing in at 90 pounds, who lived with the same family his whole life. He is blessedly well mannered and has obviously been well cared for his entire life. He came to the rescue from a 78-year old lady who needed to have back surgery and worried she wouldn't be able to care for him properly during her long recovery. I'm sure it was incredibly painful for her to part with him, especially since he was her departed husband's baby, and the rescue passed on to us an entire garbage bag she had brought with him, full of dog-sized fleece blankets, nail clippers, toothbrushes, shampoo and even beef-flavored toothpaste. We couldn't fathom what all the blankets were for, since he already had a dog bed, but it turns out that he gets cold at night when we turn the air conditioning on, as he must have when he was with his first owner, and he curls up into a tight little ball! I love dragging the dog bed into the bedroom at night as he sleepily follows me and plops down, curling into that little ball, and gives me a heavy-lidded look as I tuck one of his old blankets around him.


Broö likes peanut butter. A lot.

He is really a joy to have and we are so happy to be his new family! We're still learning all his little quirks and getting used to having this furbaby invade every aspect of our relationship :P

OH! And his name is Broö, pronounced "brew" like a beer. It really has no meaning in particular, we just thought it fit him.


Not enjoying mom and dad getting up at 5 am for work

Broö always floods the apt when he drinks water--it gets everywhere. Even on his own face.

Us at the dog park. We live in a small apt, so we go a couple times a day to run around and socialize!

I wish I could throw further, he gets visibly frustrated with my poor throwing! (This photo is for show only and is not an indication of how I throw/hold the ball ;)


Annoying but necessary PSA:

If you're looking to add a furry new member to your own family, I strongly urge you to adopt. I don't want to rant about the crises that are going on with over-breeding and the overflow of unwanted animals at shelters, but if you are unfamiliar with these issues they merit some research on your part. There are presently a whole host of serious health problems cropping up in "purebred" dogs as they are manically bred (inbred, more often than not) more and more for exaggerated characteristics (excessive wrinkles, short legs, curly tail, smushed face, etc), without regard for the viability of those characteristics or the general health of the dog. This is a well-documented problem that is being disregarded by many breeders, so do your research!! If you have your heart set on a certain breed, consider going through a breed-specific rescue (which is what we did).

I know these articles and videos are lengthy, but I had no idea this problem even existed until I happened across the first BBC piece the other day. The rest of the research I've done online corroborates with what they reported.

  • BBC produced a follow-up video, called Pedigree Dogs Exposed 3 Years Later, which you can also find online
  • Although from 2007, this paper will give you a good idea of the problems surrounding the Kennel Clubs and breed standards if you prefer text over video

I don't wish to sound as if I'm preaching from a high-horse (I'm just going to combine those two idioms), but these are some issues that sound quite frivolous (breed standards? who cares?) and yet are truly important when it comes to alleviating the suffering (both human and animal) that is occurring without our knowledge. I'm going to stop adding paragraphs to this now, but do your research and know what you're getting into. Don't think that just because someone is offering AKC registered dogs that they are a good breeder or that they have healthy dogs. Do your research! Or better yet, (much better) adopt!!! :)
  

Friday, December 21, 2012

Where have all the posts been??


I cannot believe how long it has been since I've posted! The spool seems like it was only a month ago (obviously, that isn't so). I'm currently in the process of surviving the holidays at work/home and also packing up my life to move to Houston, Texas with my wonderful guy. You can imagine how difficult that is when most of your belongings are large pieces of furniture. I think the bf is about to lose his mind trying to find space in our little apt for all these "treasures" lol but don't worry, I will pay for it thoroughly because it'll just be us 2 loading/unloading the Uhaul :) I actually do have a new piece I've been working on, a large piece, but it isn't finished yet and may not even be finished until after we move (don't tell the bf, shh). Hopefully my next update will be a look at our new apartment!

Happy Holidays!! And remember, it's the most wonderful time of the year :P


Sunday, October 21, 2012

The Super Secret Project!


In posts from a long while ago I alluded to a secret project I was working on, or rather I was more direct and stated unequivocally that I had a secret project, which was a birthday present for my bf. As you can see from my pictures I'm all about a shabby chic/distressed/worn-in and pre-loved aesthetic, which really isn't for everyone. The bf is on board because it is something I love and he is exceptionally accommodating of my brightly colored and high-personality pieces, but I know it isn't really his thing. While enduring couple-pinterest-time once (am I unbearable or what?) he mentioned that he really liked a spool table, which was just down his alley as it was dark, masculine, and wooden (which he loves) and most importantly, not chalk painted.
     I mentally took note of that comment and a couple weeks later ran across a horribly splintery and truthfully rather shitty spool at a garage sale. I didn't have much hope for it since it had some damage to the layer of wood on the top/bottom and was truly unbelievably splintery. It was only a buck tho so I took a chance (hah) and hauled it home. 

Original state--splinters splinters splinters

Original state---edges in terrible condition  
Routered edges, partially sanded


The first thing I did was router the edges to address the splintering and damaged areas. I routered every edge, top and bottom, and then got to work sanding the bejeesus out of the entire piece.
Routered edges
During the sanding process, I also used a wood filler to fill in the extra-damaged and splintery parts that would never smooth out, despite hours of power-sanding. The next step was to just go crazy with the power-sander and work my way from a 100 grit to a 220 until it was soft as butter. Unfortunately, I spent hours upon hours sanding it in the badly ventilated garage and got a sinus infection :/

Is this a classy work outfit or what?

Filled edges

One of the things I liked about this spool was the print on it, the same on both sides. It was worn beautifully, but to make this spool not only livable but safe I needed to do some drastic sanding. I was concerned that the print would be lost in the stain, so I experimented on the side I chose to be the bottom and filled in the top print with sharpie before staining. If you look at the photo below, you can see that the part I left unsharpied got totally lost in the stain, while the top logo showed through but didn't quite look natural as it had a bit of a sheen to it.

Bottom side, stained and with sharpie experiment on top logo

Darkened with sharpie, a bit too shiny to look natural

The wood was super dry and actually had some lovely grain, so the stain took wonderfully!

I wasn't super pleased with how the sharpie came out, so I decided to hand paint the side that was to be the top of the spool table. I mixed up a brownish black acrylic paint and got to work, and boy did it take a while! After painting it, I sanded the letters to make them appear aged and worn. I also added a little type to personalize my gift a bit, which you will see in a later photo.

Sanded to softness, but losing the signature printing!

Hand painted logo and type
The painted letters turned out better than the sharpied ones, although the original state was much more beautiful in that regard. My mom had a lot of cute ideas about personalizing my spool table, but I really had to reign myself in when it came to sassing it up. I wanted this to be a table the bf could be proud of in front of other men, perhaps even be something you could find in a (well-decorated) bachelor pad. That meant not writing cutsie things on it and not even thinking about touching chalk paint to the center between the table-tops....   labor of love, right?

I chose to simply put our initials on the top of the bottom, a little out of the way but still visible
Then the fun part started---polyurethane time. This is always my least favorite part of any wood project, and between the staining of the table and the top-coating I probably put this stage off for at least a month. I started this project months and months before his birthday, but by this time I had to rush to finish it! I had to polyurethane every surface of this dang spool, which took a good deal of patience to do all the multiple layers, but it turned out great and will no longer give anyone splinters! Just as importantly, the bf genuinely loved it and was very surprised. And he didn't say "oh this will look great on my porch!" which is how polite people say "I hate it this is not going in my house." Success.


Finished hand-painted type on the top surface

With good lighting, you can see much more depth and warmth in the wood. Unfortunately I don't have anywhere good to stage the spool table inside, so my photos are awkwardly outside and in natural light, which shows the wood to be rather darker than it really is. Nonetheless, enjoy!

Also, in some photos you might notice the places where I used wood filler. It hardened really nicely and sanded down perfectly, it even took the stain like a champ. The only reason it stands out is the lack of grain, which is a very predominant feature of the table. I'm okay with it though, it isn't really something you notice and the spool has a lot of "damage," like scratches and dents, which I think gives it character.

Finished


Hope you enjoyed my formerly super-secret project! If you're interested in checking out my pinterest, my user name is hannahleighes.

Have a fantastic week!


Friday, October 12, 2012

Pumpkin Pregnancy Photos and an Ambitious Carving Attempt


I have neglected this blog so much the past few months! I would regale you with all my really good reasons (read: excuses), but instead I'll just show you way too many pictures of this awesome pumpkin the bf and I carved last weekend!
Yes, I'm aware this looks like a creepy pregnancy picture. They all looked like this no matter how we held it lol

We've had a growing obsession with French Bulldogs for the past few months and are dying to get one (but we have to wait!) so when it came time to pick a design to carve, naturally the only thing we could think of was a frenchie.

As you can imagine, there aren't many french bulldog pumpkin carving stencils out there, so we printed off a picture from the internet and traced it, having to decide what would be positive and what would be negative space (aka pumpkin and not pumpkin). We were going to be all fancy and carve into some spots, but not through, to create another layer of detail and preserve the stability of the design, but there's only so much you can do with a grapefruit spoon and a carrot peeler.

Nonetheless, here's how it turned out! (after a few temper tantrums, grouching, and 2 days)(none by me)


Note to other prospective pumpkin artists: even if a so-called pumpkin art carving book tells you to do so, do not rub your new baby down in canola oil. Or any kind of oil really. You're going to spend hours carving, cursing and flinging pieces of weird smelling pumpkin guts all over your kitchen/back porch only to come home the first night it is lit and find it CRAWLING WITH ANTS! Then you'll cry and try to burn them with a lighter and bug spray. But this can be avoided! Don't. Oil. Your Punkin.

Monday, September 17, 2012

It's Aliiiiiiiiiive!


You may recall a post where I declared my little desk plant dead. It looked awful, and was as far as I could tell dead dead dead. Being the tidy and efficient person I am, I set it on my windowsill and forgot about it (except for the occasional instances when I noticed it and knew I should take it outside to compost, buuuut didn't want to)(because I'm that lazy). I finally mustered the energy yesterday and lo and behold, I was about to fling it from the pot when I noticed THIS!


It's aliiiiiiiive!!! Not only alive, but the formerly "cutest and tiniest desk" plant got even cuter and even tinier!! I'm so excited. And my new plan of action is to continue pretending it is dead, since that's obviously working wonders. So no watering, no poking. Let the experiment continue!